E0003 | Starting Seeds for My Garden (Part 2)

Podcast: Play in new window | Download
Subscribe: iTunes | Android | RSS
 It’s so frustrating to not be able to get my seeds started after doing these “starting seeds” podcasts. I thought it would help me get this out of my system a little bit, but nope. It’s worse now than a few weeks ago. I have everything I need to get things started. Just got in my seedling trays, pots, pro-mix, and the heating cable for my germination mat. I got a thermostatically controlled in-soil heater, so I can provide bottom heat to my seedling flats to encourage faster growth.
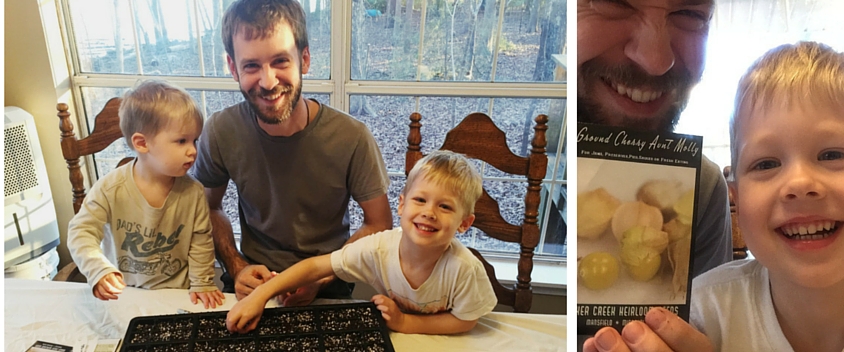
Titus, my 4 year old is bugging me every 10 minutes about planting his garden, he’s telling me all about how he is going to dig it, and rake it, and put rabbit poop in it, and seeds too! He said and I quote “And my can grow a lot a lot of cru crumbers and matos!” I hope you’re half as excited as he is! I know I’m itching to get things growing! I sure hope you are too cause thats what we are talking about today.
Last week we talked about my super-cool tomato planting method, planting by the moon, scheduling your seed sowing, keeping organized, and we finished up with a section on the kinds of containers to grow in.
This week we are going to be finishing up the basics of starting seeds with:
- Growing Medium (I like to use Pro-Mix BX with Mycorrhizae) but if you are new to gardening, use any sterile soil-less starting medium from a store. Or coconut coir.
- Environmental control (that means heat, light, moisture, and air circulation)
- And most of all Attention!
Seed Starting Growing Medium
This is the dirt, or in my case, the soil-less medium that we are going to start our seeds in and grow the plants in up until the day they are transplanted into the garden.
You can make your own potting soil with any of the following recipes if you’re of a mind to do so.
- 4 parts compost
- 2 parts coir or peat moss
- 1 part vermiculite
- 1/2 part perlite
- 3 parts sifted peat moss, or milled sphagnum moss
- 1 part perlite – for drainage and to reduce weight
- 1 part vermiculite – for drainage, moisture retention and to reduce weight
You can make your own with either of those recipes, or mix up your own special ratio, but you are looking for a well drained, moisture retentive mix.
I do want to throw in a note of caution though, if you aren’t sure if you are making really good compost, or that your source is really good, do not, do not, do not make seed-starting mix like this. Buy some potting soil or seed-starting mix from a box store and safeguard your investment. Because if you’re anything like me, you have hundreds of dollars invested in your seeds and pots for the year. If you’re not like me and are a lot more conservative in your spending, then you may have only spent a hundred dollars. But if you use contaminated municipal compost, or you made some compost that was anaerobic and full of pathogenic organisms, the last thing you want to do is try to get fancy and super cool with your seed-starting endeavors and use bad materials.
Why would you want to use compost in the first place? Because good compost is full of aerobic bacteria and beneficial fungi. Bad compost is full of the opposite. If you have good compost, you can really help your plants get off to a good start and really thrive.
If you are like most beginners and professional growers, you should just buy some decent potting soil or seed-starting mix like I do. I really like the Pro-Mix BX, it’s great for starting seeds and growing potted plants. It contains beneficial inoculant of a glomulin producing mycorrhizal fungi that symbiotically bonds with most of your garden veggeies to help them uptake nutrients better and also helps them be much more disease resistant. It’s a little pricey, but like I’ve said before, it saves me a lot of time works great and I love it. So go with what you think will work for you, but don’t be so caught up in perfectionism that you try to do things the uber super special earth warrior way, and miss out on being able to learn a new skill like gardening. Learn the skill and then save the planet if that’s your thing.
Cool, I think that covers the growing medium, on to…
Environmental Control
Temperature
The first thing that comes to mind is temperature, if you have an environment that is too cold to meet germination requirements, seed will either stay dormant and prepare for germination triggers, or sometimes if it stays in that limbo range where pathogenic organisms thrive but low enough to maintain dormancy, then you can have seed that rots in the ground. So what we want to do is make sure we have a nice warm place to start our seeds. For those of you who are on a shoestring budget, try putting them either in a centrally located closet that will stay warmer than the rest of your house, or under a blanket on the top of your fridge. Now, I don’t reccomend keeping them under a blanket for long, you will have fungal problems, but covering them for the night to keep warmth in will do a lot to help speed germination. If you can afford to do so, buy a heating mat and get the germinating seeds on a bottom heated mat. They are kind of pricey but you can get reasonably priced versions lots of places. Follow the guidance on your seed packet for germination temps, but generally staying in the 68-78 farenheight range (or 20-25 celcius) will generally give you the best germination results.
Lighting for Starting Seeds
We also need to consider lighting needs. Some seeds require light to germinate, others need darkness, but they all need light as soon as germination occurs. So we want to make sure that there is plenty of light for our new seedlings. You can use a very bright southern facing window, grow lights, or a greenhouse. In my opinion, a heated greenhouse is the best option but likely out of the reach of most growers. Next is to have grow lights in your southern facing window, then just good bright grow lights, and last on the list is a bright window.
The problem with most windows is that your light is coming in at an angle and you end up with all your seedlings growing at a 45 degree angle towards the sun and they get tangled, and misshapen, it can become a mess. But I say if that’s all you can do, do it anyways!
Now, if you can put a nice bright grow light above those seedlings in the window, now you can get them to straighten up some, and on cloudy days, they still have good light. The other major benefit of having a grow light is that you can set your light with a 3 dollar timer to stay on for sixteen hours a day, now that will really help those seedlings grow very well.
So let’s say you don’t have a window that has really good light and you have to go with a light, then pick someplace out of the way where you can keep them relatively temperature controlled and happy. In the past, I’ve germinated my seeds in a centrally located bathroom on top of a card table with a light suspended above them, and a radiant heater underneath set for 75 degrees. We stuffed towels under the doors to keep it nice and warm in there and that worked fantastic. You can get inventive in how you meet those needs as long as you keep the criteria in the forefront of your mind.
Then if you have a greenhouse, you have a much better lighting solution, it’s free, and you have the benefit of the UV rays helping to prevent damping off, a fungal disease that can make you really sad in one single day. Personally, I’d like a greenhouse with artificial lighting that was set on a timer and a light sensor. That way I could be sure that my plants were getting a full sixteen hours of light a day, the timer would turn on, and the lights would click on, then when the sun came up on a sunny day, the lights would turn off, saving me money. If it was a cloudy day, they would stay on ensuring my plants were well lit. But we can’t have everything can we. Maybe one day I’ll set up my dream greenhouse with multiple rocket mass heaters, frog pond, tropical planted end, and a nice growout area. But I digress…
Moisture & Air Circulation
The next consideration is the issue of moisture and air circulation, and I’m going to kind of lump them together because they are somewhat related.
Since everyone knows that plants need moisture to survive, I want to make sure I help you avoid some common mistakes. First off, make sure that your seed-starting mix is quite moist, but not wet, if it looks shiny when you touch it, or when shining a bright light on it, then it’s too wet. It should kind of look like chocolate cake, and have the feel of moist cake. When you plant your seeds in the mix, you’re going to plant each seed, as deep as the seed is long, sometimes this is essentially on the surface of the soil, if you water the seeds in with large droplets of water, or a stream of water, you could push them an inch under the soil, or actually wash them out entirely. So what I like to do is to mist them with a sprayer so I know they are sufficiently wet and will germinate, and then soak from the bottom up. The moist mix is crucial for this to work because most potting mixes are going to be awful at sucking water up if they are dry, but do it just fine if they are moist.
Now, I need to caution you about humidity and soil moisture. You are walking a kife edge here, I see so many people overwater things because they are overly worried about the plants, and conversely, I see people just forget about them for a week and kill the plants from a lack of watering. But we’ll get into the attention thing in a bit. You want to make sure you are letting the soil get a little dry, not enough to wilt the plants, but just before that point. It will take time to learn that dance, and just be able to tell from the look and feel of the soil where that point is, but you can learn it. Maybe you should start with some cheap seeds like some sunflower seed that you normally would feed birds, learn where that moisture point is, because once you figure that out, you have most of your seedling problems whipped. Now I really encourage you to use a bottom watering technique, that’s where you have a dish or tray of some sort, and you add water to that and put the seedling container in the tray to let the water wick up into the seed-starting mix. One of the problems people often run into is a fungal disease called damping off. It will strike suddenly and often spread from a central point, or sometimes hit a whole flat at one time. What it looks like is a very slight fuzziness on the soil surface, or sometimes nothing at all, until the point where the seedling meets the soil, it looks like someone smooshed the stem, and made it shrivel up, then it falls over and the top is still alive. This disease often hits while the seedling is still in the first leaf stage, before it puts on any adult leaves. But can still hit you well into the third set of true leaves. The main factors that promote this disease are un-sterile media, like garden soil, or bad compost, exess moisture on the soil surface, a lack of UV light. So a couple of the main ways to help prevent this disease are again, watering from the bottom which keeps the soil surface a little bit more dry, and airflow. Now don’t go putting a fan blowing on the seedlings, that will dehydrate the actual plants and kill them pretty quick, but having a fan set very low, pointed at a wall near to the seedling area will help to move air around the trays, and keep the humidity level a little lower. You only want higher humidity levels if you are trying to germinate seeds that require it, or if you live in a very low humidity environment. For most of you, high humidity levels will be an issue. So be aware of that problem.
Last, I want to talk about…
Attention
Most people think that some people are born with a green thumb. That is a myth. It’s ridiculous. What gives someone a green thumb is just attentiveness. Paying attention to details is what gives someone a green thumb. Just look at them closely every day, run through your checklist every time you look at them. Is the soil wet enough, is the air circulating, are the lights working, are they growing, is there any sign of disease? If you do that, you’ll be able to catch problems before they become catastrophic.
Phew, that’s a lot of info, and I really hope you take this and run with it. Get bit with the gardening bug and start planning your garden!
I hope you’ve enjoyed today’s show. If you have questions about starting seeds or other show suggestions, please email them to me.
I hope you have a wonderful day, God Bless, and “Go Do Good Things”
Hey Nick! Thanks for this great new podcast! If possible can you add links to come of the more obscure things you mention so new gardeners could get an idea of what you mean. For example, you mention using grow lights. When searching for glow lights on Amazon there is literally 8,856 results. Pretty staggering. I know you keep preaching “just do something” but it is hard to know what is a worthy investment and what is something I will have to replace in a year. Thanks again for all you do!
To quickly answer, the grow lights I currently use are the EnviroGro FLT48 4-Ft, 8-Tube T5 Fixture. I have two of them suspended about 20″ above a table with 20 standard flats of seedlings. I have 1440 seedlings under the two lights and since they’re using T5 bulbs which put off a fair amount of heat, I don’t need a heat mat with them. My peppers have started germinating after 5 days under the lights, some of my seedlings were up 24 hours after having been sown. I really like these lights for growing under because I know that I will have enough light to keep them healthy until transplant time. If you go with weak T8 shop lights (which are far cheaper) you will have to make sure they are in a good sunny window because you won’t be able to get them grown big enough and healthy enough for good success rates in my humble opinion.
Here is a link to where you can buy them on amazon if you are interested. If you don’t like the look of them, you should be able to use the idea and find a comparable product somewhere else. I don’t have experience with LED technology yet. So far it’s been out of my price range, but I hope to try them in the next couple years. Another light that is great is Metal Halide, but those are even more expensive than the ones I shared with you. The idea is to get some light higher in the Kelvin Temperature range. That means blue light. 5500K is the minimum IMHO. 10000K-16000K is even better.
I am working on a blog post going into more detail on this that I hope to publish this weekend or next week.
Nick
Nick,
Great podcast and thanks for getting me going on my seed starting. They are all planted and hopefully starting to grow.
Best,
Brandon
Hi Nick,
If you don’t mind, can you please add “amazon” links so we know exactly what products you are talking about? PLUS we can support you a bit with the affiliate program with Amazon.
Thanks and I REALLY appreciate what you are doing. Great stuff!