E0002 | Seed Starting For My Garden (Part 1)

Podcast: Play in new window | Download
Subscribe: iTunes | Android | RSS
In this article we cover seed starting and how to grow tomatoes without watering.
I’ve been buying seeds from lots of places. I had to go inside a few days ago and tell my wife I ordered more seeds. She just looked at me with the “you’ve gotta be kidding me” expression on her face. But I had to order tree seeds! I had to, there was no other choice. I have a problem, I know, I’m not addicted though, I can stop any time I want.
If you want to know what all I ordered, check out the Fodder Tree Seed List blog post where I talk about what I bought, why I bought those things and what I plan on doing with them. I might make an episode all on that topic down the road, but if you don’t want to wait, check out that blog post!
But enough about my seed buying habit, lets get into what to do with ’em!
Last week we talked about where to put your garden, the site selection, light needs and how to mitigate some environmental issues, as well as how to build some great soil fertility super quick. We also talked about mulching and I promised to talk about why I don’t worry about watering like most people but we ran out of time, So I’ll start with the watering thing and move on to scheduling out when to start seeds, then talk about how I start seeds for my annual vegetable garden.
How To Grow Tomatoes Without Watering
You might have been wondering what the heck I was talking about with my comment about not watering my garden. Well here’s my philosophy, I try to imitate a forest in the way I plan out where to plant things and how everything fits together. I build lots of humus rich matter that is covered with mulch, so during the summer, if I get one decent rain, that normally gets me through the whole summer growing season. I always water plants the day they are put in the ground, that’s something I don’t skip, but other than that, normally they are on their own from then on.
How about I tell you about how I grow tomatoes without watering? That always seems like a hit whenever I talk about that technique.
I developed this method while I was in the initial stage of gardening this particular plot of land. I had recently cleared it of scrub brush and pine trees to make room for some food growing plants, so the soil wasn’t terrible, but it was very poor. So what I did was let my tomato seedlings get about 2 feet tall, and I purposely gave them too little light to grow dense and thick because I wanted a long stem with long internode spacing. I wanted those tomatoes to be stretching for sunlight. And here’s why. I needed to get them deep in the soil, so I marked out every 4 feet on contour and dug a little bit just to be able to see where to dig later on. Then I cleaned out a bowl shaped depression with my mark in the center, putting all the soil on the downhill side, then I dug the holes for the tomatoes 18 to 24 inches deep with a post hole digger. I know that’s not practical for lots of you listening, but bear with me for a minute. All the soil from the holes went to the downhill and made a berm, the whole thing looked like a lot of cyclops smiley faces from above. Into the holes went the lanky tomato plants, then the hole was filled in with compost and clean goat manure and a little bit of lime because my soils are acidic and deficient in calcium and I’m not too partial to tomatoes with blossom end rot. After they are filled in, I mulch the bowl and every bit of exposed soil, leaving just the growing tip of the tomato vine sticking out.
Why do this? Have you ever observed that tomatoes will send out roots from the base of the stalk into the ground? Or if you leave a tomato vine laying on the ground, that it will root wherever it touches the soil or moisture? Well I figured that it would do the same thing if I planted it 2 feet deep. And they do. My tomatoes take a little bit longer to get up tall, but they start out with an extra 2 feet of root depth! That means if normally tomatoes have roots that go down 6 feet, that mine are at least 8 feet in the ground! I don’t know about you, but I think that’s pretty cool!
So that’s my super duper tomato planting method, it’s a lot of work, but I harvested tomatoes through a couple D4 droughts, (that’s the worst classification by the way) with no watering!
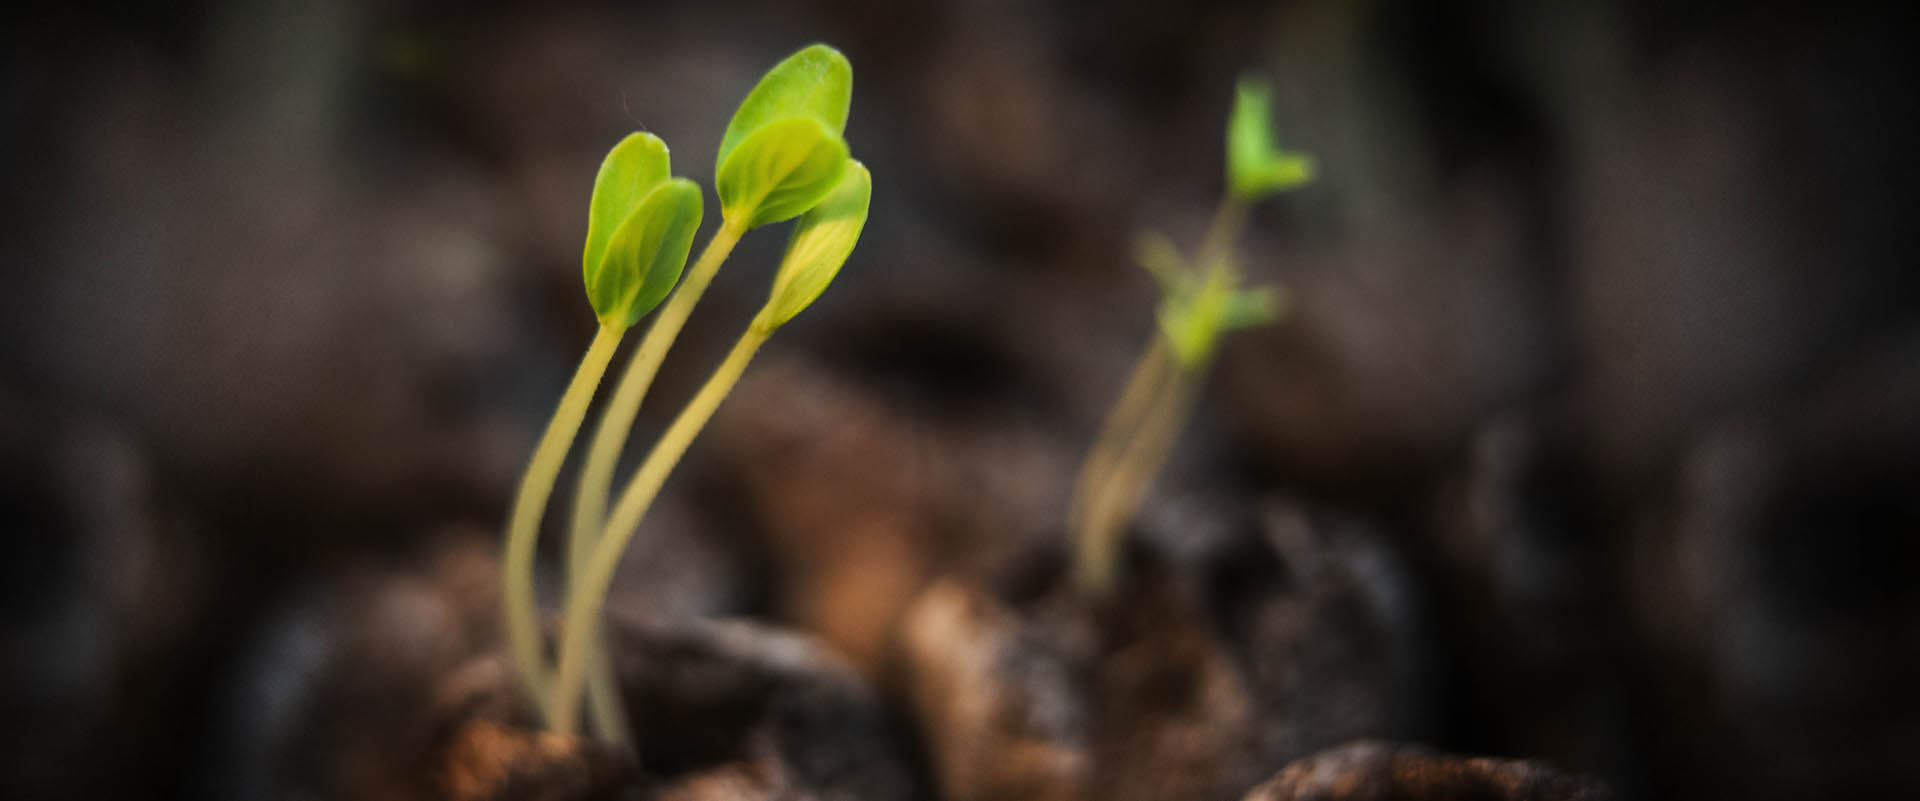
Seed Starting
There are a couple of schools of thought on seed starting. There is the typical “just follow the directions on the seed packet and get them started”. And there are the crazies who follow the best days for planting according to the Almanac. Aaaand I fall into the crazies camp. I’ll tell you what helped convince me to try it. One year I was helping a friend of mine, Bo, this man can make a tomato grow out of a blacktop parking lot and make tomatoes. He’s in his 70’s and stubborn as an old goat but I love him.
Anyways Bo tells me about a friend of his who is always competing with his gardening, it’s friendly competition but serious. They always compare yields and rib each other on when they fail at their broccoli crop or what have you. Well one year Bo’s neighbor harvests potatoes and is complaining about it to Bo a month or two later about how all his potatoes are just rotting. They both store their potatoes the same way, and get the same seed potatoes from the same store. And Bo asks him when he harvested his potatoes, after hearing his answer, Bo says, well shoot, it’s cause you harvested them in the wrong phase of the moon!
Well needless to say, I was skeptical, but he promised me that it worked and the moon really did affect the success or failure of seeds and harvesting. So I tried it both ways. I planted half my garden contrary to the moon, and the other half according to the lunar cycle. Darned if he wasn’t right. I had huge failures for the contrary ones, and pretty good success for the ones according to the moon. But I still wasn’t convinced, it could have just been weather. I did the same thing in the fall, same story, the same thing the next spring, and the next fall, and the next spring. Three years in a row I did that, and by the second year I was just doing it as an experiment to prove to myself I wasn’t crazy. I’m convinced, I’ll leave it to you to decide what you do.
How to Schedule Seed Starting
This is how I schedule my seed starting. I look at the almanac and my last frost date. You can go here to find your last frost date, and there should be 3 of them, the first number is a 10% chance you have had your last frost by that date, for me that’s March 11th, I have a 50% chance that we’ve already experienced our last frost by March 28th, and by April 14th, it’s a 90% chance we had our last frost. So I shoot for the first of April. That puts me a little past the flip a coin, and I’m comfortable with that because I live right next to a very large body of water that helps to mitigate cold weather a little bit. Plus, I can always cover with tarps and or sheets if we know we are about to get hit by a frost one night, and usually I’m a lot happier about getting plants in the ground a couple weeks to a month early if I only have to cover them once or twice.
So once I’ve found my last frost date, then I look at how long it takes to get the seed germinated and grown to it’s proper size before transplanting to the garden. For most seed packets, you should have info printed on them, and you can check out the blog for a chart you can print out for some common vegetables.
Or you can go to Johnny’s website for a great little interactive seed starting chart IF you don’t want to plant by the moon. But like I said, do what is easiest for you and don’t get too complicated with this. Lots of people have success with more conventional methods, and I would rather you get started and do it than over think and procrastinate because you are worried about doing it the “best” way.
They actually have quite a lot of great info on their website for novice and experienced gardeners.
Quick side note on gardening in urban settings, if you don’t have space to garden, let’s say you live in the city, or an apartment, there are things you can still do and I HIGHLY encourage you to do so! If you have a balcony, get a couple large pots with saucers and some potting soil, just generic potting soil will do fine. You can do 100% compost, but if you are in the city, you likely don’t have access to good compost, municipal compost is not a good idea by the way. Just get some potting soil and whatever veggies and herbs you have space for and just try it. I’d say something like a cherry tomato, a hot pepper if you like them, some culinary herbs and maybe a couple flowers. Nothing wrong with growing something beautiful for the sake of aesthetics.
Alright, back to our scheduling. Now we have our last frost date, and an estimated planting time for all the seeds we are starting indoors for transplanting into our garden or (containers if you are container gardening).
So all we did to get that again was look at the date we need to transplant our baby plants into the garden, and counted back however many weeks to find our sowing date. For instance with tomatoes, you generally want to start them 4-8 weeks before transplanting. You can even start them earlier than that, and I normally shoot for 10-12 weeks but that’s cause I like to grow mine larger so I can plant them deeper than most people do.
Now if you are super complicated like me, you will go and look at the almanac, and adjust your planting dates accordingly. Here are two links to where you can find planting dates at different almanac websites. Be sure to select your correct growing region.
Planting by Moon Phases – Region 1
I like going to FarmersAlmanac.com a little better because I like to dial in to my starting times more than the generalized information at Almanac.com. But do what works best for you.
I’ll go to FarmersAlmanac.com, and I’ll copy and paste that into a text file, and I’ll use the highlighting feature to make it easy to pick out my dates for the different seed crops.
Organizing Seed Packets
Once I have an idea of when those need to get started, I’ll sort all my seed packets into the groups. I’ll have above ground seeds which are the veggies like tomatoes, beans and things like that. Root crops, go in a group, and what ever other groups there are, like vining crops, leafy greens, flowers, etc. Now I don’t make a distinction between vining and above ground, tomatoes are vines, so are melons, and beans, so if there is a good time to plant vining things and I happen to be available that day, and it’s close to the time I need to get tomatoes started, into the pots they go.
Alright, now we are organized, calendar is set up, seeds are bundled into their groups so it’s easy to grab them and go, and we are set!
Materials for Starting Seeds
Lets get our materials list sorted out for starting seeds. We need the following:
- Containers (I use black plastic 6 pack cells) Please don’t use those awful peat pots.
- Growing Medium (I like to use Pro-Mix BX with Mycorrhizae) but if you are new to gardening, use any sterile soil-less starting medium from a store. Or coconut coir.
- Environmental control (that means heat, light, moisture, and air circulation)
- And most of all Attention!
Let’s start with…
Containers
Like I said, I use the black 6 pack plastic cells. I know they aren’t sustainable, but they work for me and I’m going to use them and reuse them because I don’t have time to fool with other fancy methods like soil cubes and whatnot. Use what you want, but there’s a good reason all professional growers use the plastic cell-packs, they work! So if you are a beginning gardener or a novice, use them and master the basics before you branch out into more advanced things like soil cubes. Alternatively you can use recycled pots and plastic containers like yogurt cups. But I start so many plants in the spring that my time is worth the money that it costs to shell out fifty bucks to buy new flats and cells so I can start hundreds of plants in the spring and not have to worry about disinfecting and washing pots.
That brings me to recycled pots, if you are getting recycled pots or cells from a nursery, or from last year, you must rinse out the soil and roots from the pot, and get them quite clean. Then you need to disinfect with a simple bleach solution of 1 part bleach to 9 parts water. Dip or spray that solution on the pots and let it dry. I have in the past made the bleach solution, filled a backpack sprayer, and set the pots all on a concrete parking space, and sprayed them all down and let them dry in the sun. That worked, but it was a heck of a lot of work and took hours and hours in the cold, I was soaked from washing pots, freezing cold, miserable, and it took me 3 or 4 hours. I’ll pay fifty dollars to have amazon deliver my pots and trays to my door and stay warm inside rather than do that again.
Next, I like to have the black plastic trays with no drainage holes so I can bottom water my plants. It helps cut down on diseases like damping off and makes your life easier, so I use them.
But it looks like I am not going to have enough time to get everything covered, so we will have to pick up where we left off next Friday with growing medium and I’ll go on to talk all about heat, light, moisture, air circulation and attention to details!
I hope you’ve enjoyed today’s show, if you have questions or show suggestions, please email them to me
I hope you have a wonderful day, God Bless, and “Go Do Good Things”
Will you be adding your podcast to iTunes?
Is the podcast in iTunes?
It is submitted to iTunes, but it takes a while to go through their verification process. It should be available there soon. If you don’t want to wait, you can manually subscribe by copying and pasting the RSS feed URL into the podcast subscribe spot in iTunes.
Love the podcast! Thanks for the good info Nick!
Thanks for a great episode. I have to move my garden this year and I plan on using your layering method for the new bed. I know I am overthinking this but I wanted to know your opinion on where to plant started plants versus direct sow seeds. My inclination from being trained as a child is to sow seeds or plants directly into the soil but with all of the layered material it would mean I have to dig down about 6 or more inches to do this. I know that when I walk in the woods I see seedlings starting to sprout in just the duff layer. Do you plant seeds and seedlings into the layered material you put down or do you set them into the soil underneath your layers? Thanks for answering.
If I am direct sowing plants, I pull mulch back and sow directly into the soil. With transplants, I do the same thing and plant them in the soil then pull mulch back to the plant.
Do you have links to your preferred trays and 6-packs?
Here are the trays I ordered, but any standard tray will work. I like the ones with no holes so I can bottom water easily
http://amzn.com/B0058PTK6M
Here are the seedling trays I ordered, they are smaller than most people use, but I keep my plants well fertilized and watered so I can keep them in smaller cells for longer cause I pay very close attention. My seedlings are checked on about 6 times a day. So you might want to go with larger individual cells.
http://amzn.com/B00C1T2REK
Here are the thermometers I bought, they went up in price since I bought though. But any dial thermometer should work. I don’t like the digital ones because batteries are expensive and run out. I like to glance at the dial and see where it is. I suggest 2, that way if one fails and sticks, you have a second to alert you to the fact that the other one isn’t working.
http://amzn.com/B005S2DOAI
Here are some larger cell trays
http://amzn.com/B00WGSFWWK
http://amzn.com/B00VF6BRTQ
Wow a ton of useful, tried and true information! I chuckled when you talked about rinsing out pots and disinfecting them for the new season…the very same chore I’ve been putting off! Keep the podcasts coming…
Thanks! I plan on it! It really is a big hassle to disinfect those pots, sometimes it’s worth it though!
This is awesome Nick! I really “dig” listening to your podcast. Great info, really helps those of us not exposed to cantankerous wise old guys!!
What are your thoughts on using used “k cups” for seed starting by just ripping off the tops and leaving the grounds in there? Add soil, plant, maybe melt a hole in the bottom with a soldering iron.
Not a fan of the idea, I hate k-cups in the first place and encourage you to get a french press for the environment’s sake and the sake of good coffee… Second, not a fan of them for the plants, there is very little room in there for root development and the little filter is actually glued to the sides of the cup I think, which further reduces the space available. I think if you have a ton of them and they’re trash anyways, maybe give it a shot, but if you have another option, try to steer clear.