E0027 | Compost Like a Pro

Podcast: Play in new window | Download
Subscribe: iTunes | Android | RSS
Composting
Welcome back to the Homegrown Liberty Podcast! Thank you for joining me again today. We’re going to get into composting, a couple methods from the simple to the complicated. Some of this is best shown rather than just talked about but I’ll do my best to paint a picture for you and explain in detail. For those of you who know me or have been listening to the show, you probably chuckled at me saying the word detail. For some reason I’ve been told that I give really detailed instructions. But yeah, today we’re talking about composting, but before we get into it I want to let you know about some changes that are coming soon.
News
Hopefully next week, or maybe the week after, the show is going to change a little bit more. I’ve been wanting to mix things up for a while now, and since we’ve been doing the show for 6 months now. I figured now was the time to bump things up a notch. I want to get the audience involved a little more, and get some more back and forth. So stay tuned for the exciting new format and topics we’ll be covering.
Plant of the Week
Ground Nut! Most of you have probably never heard of it. But it’s one of the plants I’m working on propagating to plant a ton of here on my land. The tuber is very much like a potato, but finer grained in texture, and kind of nuttier in flavor than a potato. It’s supposed to be delicious, I haven’t tried it yet but I’m looking forward to it as soon as I have some harvestable sized tubers. They’re reported to have about 3x the protein of potatoes, twice the iron, and ten times the calcium. I’m real excited to get this plant growing in large numbers. It’s a wild plant called Apios americana that grows a tuber and a climbing vine. Some people might mistake it for poison ivy but I don’t think it looks anything like it, just be warned, it can have three leaves as a small new shoot, so don’t start pulling or chopping those tiny vines that emerge. The more mature vines have pinnate leaves with 5 to 7 leaflets. Think pecan leaves. It looks like a little stem with several leaves on the stem but it’s actually a whole leaf in a way.
This plant likes moist soils and is often found along streams and bodies of water. And it just so happens I live on a large reservoir so I want to plant it all along the shoreline. Here’s some of the really cool things about it though. It’s a nitrogen fixer, which means that it takes nitrogen from the air and symbiotic bacteria use it and the plant is able to utilize that otherwise unusable nitrogen as fertilizer. So it’s able to survive in poor soils, and thrives in good soils.
Propagation
You can grow it by seed or by tuber. Since it sets nice tubers, the easiest and most reliable way is to get some tubers and plant them in moist potting soil and give the vines something to climb on. Just keep it consistently moist and you should have no trouble with it!
What Is Compost?
First let’s go over what the stuff is, and make sure we’re all on the same page here. So my definition of compost is matter that has rotted and turned back into soil. That’s basically the gist of it. The word essentially means something that has decomposed. By that definition it can be anything that can decompose. So keep that in mind when you go to buy what someone calls compost. There is good compost and bad. Good compost in my opinion is made from either exclusively plant matter that has been broken down through what is called a thermophilic or “hot” compost method. This method uses bacteria that like and operate well in very hot conditions. The hot method will kill pathogens, denature lots of toxins, and kill most seeds. Personally I define bad compost as most municipal and waste treatment plant compost. They are often made by combining sewage effluent with carbon to biologically break down the components in a hot compost method but the problem with that material is that it contains inordinate amounts of pesticides, pharmaceuticals, heavy metals, and could still contain pathogenic organisms. Were it me, I would say, any vegetables should be grown in “good” compost, while the product of larger municipal compost operations should be used in more broad acre and spread out application to reduce the impact of anything harmful still contained in the compost.
Cold Composting
Advantages:
- It’s super simple
- Takes no extra effort
Disadvantages:
- Takes a long time, a year or two before you have a good compost product.
- Pathogens (plant diseases) are often not eliminated
- Insects and insect eggs are not killed in the process
Unique Characteristics:
- Fungally dominated.
The simplest method is to cold compost. And you’re probably thinking, “but you just said hot compost is best”. Well, hot composting is best for annual veggie production. But there are times when you want to use compost for trees instead of for garden veggies. In that case you are probably looking at making a lot of compost and it’s very energy intensive to turn that compost and aerobically compost. So in that kind of situation where you have a lot of material and you just want to turn it into good soil but don’t care how long it takes. All you do is pile up organic material and let it rot. You can use things like hay, straw, leaves, branches, chipped wood, manure, heck, even potatoes will rot and turn into soil. One thing I do on our land is whenever we clear brush or take down a tree that isn’t needed for firewood. I cut it up as small as possible to keep the pile dense and moist. We pile it up in the shade, cover it with leaves and let it rot. The trick is that you want to try and keep it constantly moist and no airflow. If you just pile it up dry with lots of airflow, you’ll have a forest fire hazard. If you pile it up dense and moist, and keep it covered in leaves, in my climate it will rot down in a couple years and make some of the most fantastic potting soil or tree amendment compost you’ve ever seen. It will be infused with beneficial fungi and will help push out pathogens from the environment around your trees.
You can do the same thing with leaves, and MAN that stuff is amazing. Just shred your leaves and pile them up. Make sure you wet the layers down as you add them, keep it moist, and in the shade. After it all rots down to soil, that will be one of the best sources of compost you’ve ever seen.
Fungally dominated compost can be good or bad depending on your needs, but it can quickly and easily change to bacterially dominated if you have some bacterial dominant compost to add to it, and some food for the organisms, turn it every couple days and voila, in about a week you’ll have changed it over to bacterially dominated compost.
Hot Composting
The best way to make compost in most instances though is to use a hot compost method. I really like the berkeley method for hot composting. And here’s one of the best tips you’re ever going to get on this. Chopped materials compost the best. If you have access to a shredder or can rent one or buy one, shredding all the materials will make a WORLD of difference when you want to build a successful compost pile. The smaller and finer the particles, the quicker the material will break down. I will say this though, you can go too far with grinding up the materials. Too fine and air won’t be able to get into the pile and will promote anaerobic breakdown. You want it to be light and fluffy and easy to turn. If you put whole plants and sticks in there along with huge chunks of manure, you’re not going to get a good result with the method we’re talking about here. One of the best compost piles I ever made was chopped hardwood leaves 50% by volume, lawn clippings (grass, clover, weeds) about 40% by volume, and mixed rabbit and goat manure 10% by volume but that could be substituted for most other manures except for really hot manure like poultry or pig.
What made it work so well is that the manure was in little pellets, the grass clippings were chopped up, and the leaves were chopped up. It worked like a charm and was done composting into beautiful rich black earth in about 2 and a half weeks. When trying to picture what those percentages look like in real life, imagine 5 gallon buckets full for every 10%. So the image would be a pile of the lawn clippings that’s 5 buckets full of clippings, shredded leaves that’s 4 buckets, and a single bucket of manure. You just pile those materials up alternating and wetting it down with a garden hose and voila! The pile is made and will start composting shortly.
The Berkeley Method:
Let’s talk specifics with the berkeley method instead of me rambling around.
Advantages:
- Compost is ready in 2 weeks to a month
- Weeds and weed seeds are almost all eliminated
- The hot compost process will kill most plant disease organisms (heat resistant viruses like tobacco mosaic will not be killed)
- You probably need the exercise like me
- Insects and insect eggs are killed by heat in the process
Disadvantages:
- The exercise is not particularly fun
- It’s hot outside and I don’t want to turn the compost pile
- It can be difficult to find the right balance of materials and moisture
Texture:
Your particular compostable materials will break down the best if you can chop or shred them to between ½” and 2” give or take. The closer you get to branches, and woody material, the smaller you should chop up your material. If you’re wanting to add wood, it’s best to chip it towards the small end of the spectrum in order to have it break down quick enough to be finished alongside the rest of the compost materials. Really moist stems and succulent materials don’t need to be chopped up as finely because they rot so quickly Chopping everything up with a shovel or some other tool is normally good enough. But I like to pile stuff up and run a lawn mower over it to make my life easier.
Carbon to nitrogen ratio:
Whatever materials you are composting, you should shoot for close to a 30 to 1 carbon to nitrogen ratio. That means 30 parts carbon to 1 part nitrogen. Before you get frustrated, I know that’s almost impossible to figure out, don’t worry! Just shoot for a 50/50 mix of green stuff or manure, to brown plant material. That will give you close to a 30/1 (C/N) carbon to nitrogen ratio. What qualifies as “green”? That can be grass clippings, green cuttings from a shrub, weeds from your garden, manure, fruit and veggie scraps. Brown stuff is dead, brown fallen leaves, dried dead grass, straw and woody materials like wood chips/shavings and sawdust. You can use stuff like shredded paper and cardboard as long as you make sure they are quite shredded and don’t stick together and make a mat. Matting is bad, because oxygen is needed for quick breakdown of the materials and matting prevents oxygen from getting through the materials that are breaking down. If you aren’t careful, grass clippings will mat also. That’s why I like to mix them with other materials, or if nothing else, add them in thin layers.
Moisture content:
Water is essential to a healthy and productive compost process. The bacteria and other organisms in the pile need around a 50% moisture level to be healthy. It’s not really easy to figure out what that means with that detailed info, but it essentially needs to feel moist when you put your arm inside the pile. You will need to experiment to get it dialed in properly. Too much moisture will make it soggy, smelly and anaerobic. Too little moisture and the process will stop or slow down. Neither of those options are what we’re shooting for at all. We want a consistently moist but not wet compost pile. Think perfectly moist potting soil. If you were to put your hand into the mix and rub it all around, it should come out damp, not dripping, not wet like you just put your hand in a pile of wet towels, but damp like you just rubbed some damp towels on your hand. You should see some sheen of moisture on your skin and feel the moisture. If you stick your hand in there and it doesn’t feel but a little bit damp, it probably needs more water.
Compost Volume:
There is a specific minimum volume that you need to shoot for to get good heat retention when the little critters are munching away. That pile should be about 3’ cubed, to 5’ cubed for a good compost. The reason for that is if it’s too small, it will lose heat quicker than it can build and the specific organisms we are trying to advantage need a certain temperature range.
Temperature:
The target temperature range we are shooting for when doing a hot compost is around 160F (71C). In order to reach that temperature we need the right volume like we covered already, but we also have to supply oxygen for the little organisms to use. They use oxygen to break down the plant matter, so for that reason we can’t shut them up inside something like a trash bin or a bucket or bag. This is an “aerobic” (with oxygen) process, as opposed to fermentation which is an “anaerobic” (without oxygen) process. If your pile is not getting hot enough you don’t want to hold your hand in the center of it after 2 or 3 days, you probably have a problem with one of the criteria for making a good compost. You can buy long probed thermometers to measure temperatures inside the center of the pile, they’re useful, but by no means are they necessary.
Turning:
You will need to turn the compost pile to prevent it from getting too hot. It doesn’t really matter if you mix the whole pile together like a tossed salad if you have the means to do so. I much prefer to scoop a pile up with a tractor bucket and dump it, repeating that process 3 or 4 times to mix it thoroughly, but if you don’t have equipment to do so, then you will need to do it by hand. To start with, you will take a tool like a manure fork, it’s like a pitchfork but the tines are closer together and it’s meant for working with manure and bedding, which is essentially what compost is to begin with so it’s very well suited for the job. You will strip off the outside 8 inches or so and pile that up to the side of the first pile. Then you will check the moisture level and wet it down if needed, and proceed to move the core of the initial pile and cover the new pile with the material from the core, again checking for moisture and wetting if needed. This turning serves a few purposes, it aerates the composting materials which the organisms need to stay healthy and populate the pile, and it releases exess heat that might build up. If the pile overheats and gets up in the 170F range, it will start to kill those beneficial bacteria and shut down the composting process. You’ll need to start over from the beginning and add more material to the partially finished pile. We’ll get more into that in a bit though. Because the outside of the pile will lose heat, generally only the center of the pile is ever at optimal temperatures, so by turning it, we are making sure we end up with a uniformly decomposed pile at the end. If you turn the compost every day, it should take you a little over or right around 2 weeks for it to finish, and the less often you turn the pile, the longer it will take to finish. The official method and the schedule most people suggest is to turn every other day which should finish up in about 3 weeks.
Containers and Weather:
Lots of people seem to really like the spinning bins, and anything they can buy that will “make their compost better”. I have never bought one of those, I think they’re garbage, but if they help you and make your job easier, I say great! But by no means do I want you to think that they are special or needed to make good compost. I’ve seen homemade bins that work great. I have made compost cages that worked great. To make one of my amazing compost cages get a standard horse panel or utility panel, or even hog panel. I prefer the horse panel because it will hold smaller sized material with 2”x4” openings, the utility or goat panels have 4”x4” openings, where the cattle panels and hog panels are even larger and often the material falls out and makes more work for you.
Take a panel and bend it into a circle, overlapping the ends by about a foot and a half, then use some cable clamps sized to fit your panels, and attach the two ends in at least 3 points, the top, middle, and bottom. Now you should have a tube with a diameter of about 4 ½’ if you use a standard 16’ panel. You can use fence if you want to, but the panels hold up for far longer and are much easier to manipulate without crushing. To use one of those bins, simply fill it with your composting materials and let it do it’s job. Tie a rope on the top of the bin and drape it over the top to the far side so you can flip it over and dump the contents out, or run the rope from 3 points on the top of the panel, up through a pulley and pull the tube cage up leaving the compost in a heap, then put it back in the tube. That’s how to use the thing, simple, but a lot of work.
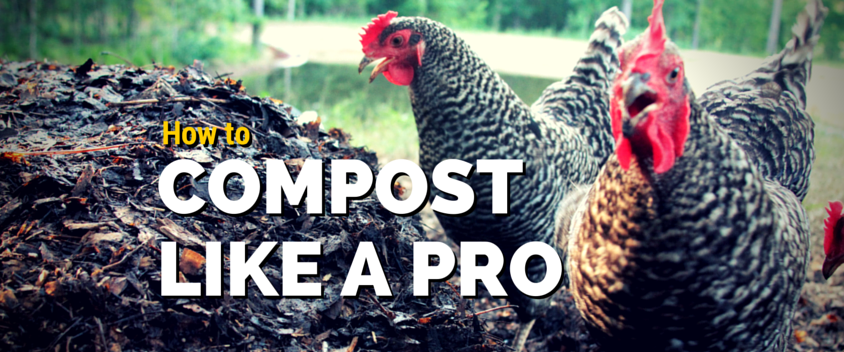
Or you could just simply make a pile like I do and strip off the sides and flip the pile essentially inside out. It will look like a big pile of dirt when it’s done. To make it even easier on you, do what I do, let your chickens at it. They’ll flatten the pile in no time, leaving you with only the re-stacking job, thereby saving you half the work of turning the compost.
If you are expecting a lot of rain, you will probably want to cover your pile with a tarp to prevent it from getting too wet. You should also always try to compost in the shade for a couple reasons. The first is that it will dry out and overheat if it’s in the sun, second, a lot of UV light will tend to kill bacteria which is counter productive, and third, who wants to shovel compost in the blazing sun?
Adding Materials:
Composting is kind of like baking a cake. You add the materials, mix it up, and let it bake. Except for composting, you keep taking it out of the oven and stirring the heck out of it. So I guess my analogy isn’t that good. But the point is, when you bake a cake, you put in all the ingredients at once and you don’t add any more eggs or sugar or flour when it’s halfway baked. With an exception! If you need to compost an animal’s body, or fur, or guts or whatever, you should put that corpse into the center of an active and hot pile. It should only take a few days to break the body down. Only do that if you have a hot, active, large compost pile or you will attract scavengers and vermin.
Magic Compost Starters:
The organisms you need are present in nature and on the plant and manure matter that you’re making the compost out of. You don’t need to buy any special products or ingredients to get things going. However, with that said, you can give a compost pile a boost by adding some molasses or sugar dissolved in water. A cup of sugar or molasses dissolved in a gallon of warm water will kick a compost pile into high gear if it’s being sluggish. It’s a lot of sugar for microbes to feast on quickly and will help to boost the population in the pile, but by no means is it actually necessary.
Troubleshooting:
If you built the pile right, added close to the right amounts of greens and browns, made sure it’s at the right moisture level, the pile should heat up within a day or two. If it doesn’t, check the moisture level, that’s normally the one place people mess it up, it’s either too dry, or too wet. If it’s too wet, spread it out to dry for a day or add some absorbent materials into the pile, if that means sawdust, then add a little manure as well to maintain the C/N ratio. If it’s too dry, add water. If it’s just right, you probably don’t have enough nitrogen in the pile. You can add manure, or cut comfrey leaves, cut fresh green plant matter, anything with nitrogen will help bring that into balance and give the critters enough juice to get composting.
If you smell ammonia, you have too much nitrogen in the pile and need to slow it down by adding dry woody matter or some other high carbon source. The smell of ammonia is all your precious nitrogen burning up and blowing away in the wind. We want to lock it up as fertilizer, not breathe it!
As your pile finishes up the process, the temperature will drop until it’s cool throughout the whole pile or just mildly warm in the center. It’s ready to go at that point. And if you want to make compost tea, that’s the best time to make it, there will be tons of bacteria and other beneficial organisms in the pile at that point and it’s prime for compost tea. If you didn’t chop things up enough, or some of the material was extra large, or you had thicker pieces of wood, then you might want to screen it through hardware cloth or small chicken wire. I’ve seen people use anything from ½” hardware cloth, up to 1” chicken wire. Use it as you see fit. This is precious stuff though, and a little will go a long way. I think of it more as a dose of bacteria than a physical fertilizer although it is a great, slow release fertilizer source.
So I hope this has demystified the whole compost thing and empowered you to create some of your own black gold. Try it out, make some compost and if you run into any snags, please let us know on the facebook group so we can all help you find success! And if you decide to make some compost after hearing this episode, please post in the comments or on the facebook group and share a picture! I love to see when this show makes a difference in your lives.
Thank you so much for listening!
To reach me with questions or comments, just send an email to nick@homegrownliberty.com
Until next week
I hope you have a wonderful day, God Bless. And as always “Go Do Good Things”
To add to your container and weather section – I found a really helpful article that explains the ins and outs of home composting. It also goes onto explain how to create your very own compost bin from old recycling bins – https://www.wheeliebinstorage.co.uk/blog/home-composting-everything-you-need-to-know/
Nick, you mentioned in one of your podcasts about spaying your homemade ‘bokashi’ like mix in the chicken yard/compost to reduce smell and assist in composting. Can you point me to that recipe or podcast episode? Best, Ric
I actually haven’t done an episode on that, so maybe it’s a good topic for this winter! In the meantime you can look up online how to make a lactobacillus serum. Relatively uncomplicated instructions and it works fantastic.